We include products we think are useful for our readers. If you buy through links on this page, we may earn a small commission. Read our affiliate disclaimer here.
Yes, you can fill vinyl fence posts with concrete to enhance their stability and durability. This helps ensure that the fence remains sturdy and can withstand various weather conditions.
I’ve found that filling the posts with concrete provides added support, especially in areas prone to high winds or other environmental factors. It’s a straightforward process that contributes to the long-term integrity of the vinyl fence.
Overall, this method has proven effective in preventing leaning or shifting of the fence over time, and I recommend it based on my positive experience as a fence owner.
Reinforcing Vinyl Fence Posts with Concrete for Long-lasting Durability

Reinforcing the posts with concrete is a crucial step for ensuring long-lasting durability. Here’s a simple guide, drawing from my first-hand experience:
1. Evaluating the Post: Begin by inspecting the vinyl fence post. Note any irregularities or jagged edges resulting from cutting, and smooth them out for a clean finish.
2. Preparing the Ground: Before filling the post, ensure the ground around it is level and free from any standing water. This step prevents potential damage during and after the reinforcement process.
3. Choosing the Right Mix: Opt for a concrete mix that complements the vinyl post. A balanced combination of sand, pea gravel, and Portland cement works well. Adjust the water content to achieve the desired consistency.
4. Filling the Post: Pour the concrete mix into the post carefully, working from the top to the bottom. Tamp down the concrete to eliminate air pockets and ensure a solid fill.
5. Drying Time: Allow the filled posts at least 24 hours to dry. During this period, check periodically by tapping the posts with your knuckles. They should feel sturdy but not completely hardened.
6. Setting Toe-Plates: Once the initial drying is complete, set u-shaped toe-plates by pounding them gently with a rubber mallet. Ensure they snugly fit against the ground.
7. Secondary Filling: Use the same concrete mix to fill around the posts, providing additional support. Tamp down as needed but leave room for more concrete around the posts.
8. Temporary Fencing: Erect temporary fencing around the construction area using scrap lumber or twisty ties. This safeguards the posts during the drying phase.
9. Final Installation: Set the finished posts into their holes, securing them with wire or baling twine. Adjust the post depth and remove excess concrete if necessary.
10. Admire Your Work: Stand back and take pride in your reinforced vinyl fence posts. This meticulous process ensures stability, durability, and a fence that stands the test of time.
Get Matched with Local Fence Professionals
Answer a few questions and we’ll put you in touch with pros near you.
Can you Install a Vinyl Fence Post Without Concrete?

In my experience, opting for a concrete-free installation provides a quicker and less labor-intensive process. It avoids the hassle of mixing and pouring concrete, making the overall installation more manageable.
This approach is particularly beneficial if you’re looking to complete the project swiftly and with minimal disruption to your landscape.
To achieve this, I dug trenches deep enough to accommodate the vinyl fence posts, ensuring they sat about three inches below the ground’s surface.
Placing a layer of gravel at the bottom, covering it with sand, and adding soil on top provided a stable foundation. The result was a secure and durable fence without the need for traditional concrete-filled posts.
While this method worked well for me, it’s essential to consider factors like soil quality and specific site conditions.
The success of a concrete-free installation depends on the stability of the ground and the overall landscape.
One notable advantage is the reduced impact on the surrounding environment. Unlike concrete-filled posts, this approach minimizes disruption, allowing for quicker recovery of the lawn or garden area.
Find the right fence contractor for your project
If you want to install a vinyl fence without concrete, here are some ways to do so.
- Dig a trench – Dig a trench that is deep enough so your post will be about three inches below the ground’s surface. This way, you can place gravel at the bottom of the trench and put sand on top before adding dirt back in. The pit should be as wide as your fence post, which will allow the post to sit flush with the ground.
- Install metal stakes – You can install metal stakes that are long enough to go into the ground about three feet. Pound these stakes in at an angle. When you’re ready to install your fence, attach it to the metal stakes.
- Attach wire – If you don’t want to use any posts or stakes, you can use wire instead. Attach the bottom of your fence to a metal stake, and attach the top to an existing pole. This will keep your fence together and prevent it from falling over or breaking.
FAQs
What type of Cement for a Vinyl Fence Post?
Typically, a high-quality all-weather vinyl fence post can handle being filled with concrete that doesn’t have any additives. The problem with filling the vinyl fence posts is that it requires pouring hundreds of pounds of concrete into tightly packed small holes.
In general, avoid using cement mixes designed for below-ground installations. They need to be able to handle being outdoors, including the hot sun.
- Check this article: Is power washing is a better idea to clean vinyl fences?
What are the Alternatives for Concrete?
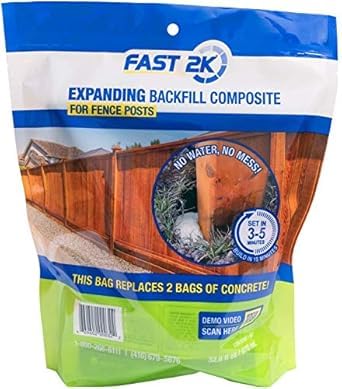
Fast 2K Fence Post Mix and Concrete Alternative
However, if you’re looking for alternatives to concrete, there are several options to consider:
- Quick-Setting Cement: Quick-setting cement is a fast-drying option that sets in as little as 15 minutes. This makes it an ideal choice for fence installation, as you can quickly move on to the next post.
- Plastic Fence Post Mix: This is a pre-mixed product that comes in a bucket and can be poured into the post hole. It sets in just a few minutes and is a great alternative to concrete if you’re working in a location where concrete mixing is not feasible.
- Foam Fillers: Foam fillers are lightweight and expand to fill the post hole. They are a good choice if you need to fill a large area quickly.
- Gravel: Gravel is an affordable and easy alternative to concrete. Simply fill the post hole with a layer of gravel, and then set the post on top. The weight of the post will keep it in place.
- Engineered Fill: Engineered fill is a combination of sand, gravel, and other materials that have been specifically designed to provide stability to fence posts. This type of fill is ideal if you’re installing a fence in an area with poor soil or if you’re concerned about the stability of your posts.
At FenceAdvise, we pride ourselves on being the most reliable and trustworthy source of fencing information. Our articles are based on only the highest quality sources, including peer-reviewed studies, to ensure that our readers always have access to accurate information. Read more about our Editorial Guidelines, About Us.