We include products we think are useful for our readers. If you buy through links on this page, we may earn a small commission. Read our affiliate disclaimer here.
imagine you have a super cool wooden fence that keeps your yard safe and looks really nice. Now, we’re going to make it even better by adding strong metal posts to hold up the fence. It’s like giving your fence superhero powers!
You see, wood is great, but metal posts make the fence super strong and last a really long time. We’re going to learn how to put these metal posts in the ground and attach the wooden fence to them. It’s kind of like building with blocks, but bigger!
We’ll follow simple steps to make sure the fence stays in place and looks awesome. You can do it yourself with a little help, or you can watch and learn how the grown-ups do it. So get ready to create a super fence that keeps your yard safe and looks amazing!
Key Takeaways
fence advise editor’s choice
Metal Post For Wood Fence
Can You Attach Wood Fence Panels To Metal Posts?
Yes, you can attach wood fence panels to metal posts. Attaching wood fence panels to metal posts is a practical and effective method of building a durable and long-lasting fence. This approach combines the sturdiness of metal posts with the aesthetic appeal of wooden panels.
Here’s a detailed explanation of how this process works:
When constructing a fence, the choice of materials is crucial for its strength and longevity. Metal posts, typically made of steel or aluminum, offer excellent structural support.
They are resistant to weathering, rot, and pests, which can weaken traditional wooden posts over time. By using metal posts, you create a strong foundation for your fence.
Wooden fence panels, on the other hand, are favored for their natural beauty and ability to provide privacy.
However, wood is susceptible to moisture, insects, and decay, especially if it comes into direct contact with the ground. Attaching wood panels to metal posts helps mitigate these issues.
The process involves securely fastening the wood panels to the metal posts using various hardware options such as brackets, screws, or specialized clips.
These connectors are designed to hold the wood panels in place while allowing for expansion and contraction due to temperature and humidity changes. This flexibility prevents the wood from warping or splitting over time.
Get Matched with Local Fence Professionals
Answer a few questions and we’ll put you in touch with pros near you.
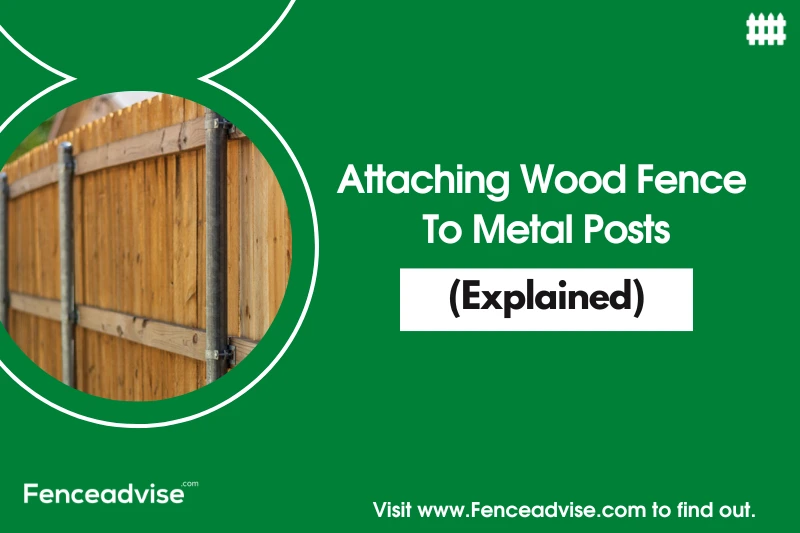
How To Install Wood Fence On Metal Posts?
Installing a wood fence on metal posts involves a step-by-step process that combines the strength of metal posts with the aesthetic appeal of wooden fence panels. This method provides a durable and visually appealing fence that can withstand various weather conditions and last for years. Here’s a detailed explanation of how to install a wood fence on metal posts:
Quick Resource List
- Screw Gun- Check Price
- Phillips Head Screw- Check Price
- Shovel- Check Price
- Cement Mix- Check Price
- Metal Tube- Check Price
- Wood Fence Panel- Check Price
- Wood Preservatives- Check Price
Materials You’ll Need:
- Wooden Fence Panels
- Metal Posts (Steel or Aluminum)
- Post Brackets or Clips
- Screws or Bolts
- Level
- Measuring Tape
- String Line
- Concrete Mix (if necessary)
- Post Hole Digger (if necessary)
- Shovel
- Gravel (for drainage, if necessary)
Step-by-Step Installation:
1. Prepare the Area:
- Determine the fence line and mark the locations for the metal posts. Use stakes and string lines for accurate alignment.
- Clear any debris or vegetation from the area where the fence will be installed.
2. Install Metal Posts:
- Dig holes for the metal posts using a post hole digger if required. The depth and diameter of the holes will depend on the height and size of the metal posts.
- Place the metal posts in the holes and ensure they are level and aligned with each other. If needed, use braces to hold the posts in position temporarily.
- If using concrete, pour the mix into the holes around the posts and allow it to set according to the manufacturer’s instructions.
3. Attach Post Brackets:
- Once the metal posts are secure, attach post brackets or clips to the posts. These brackets will hold the wooden fence panels in place.
- Ensure the brackets are level and evenly spaced along the height of the posts.
4. Install Wooden Fence Panels:
- Place the wooden fence panels between the metal posts. The panels should fit snugly within the brackets or clips.
- Use screws or bolts to secure the wooden panels to the brackets. Make sure the panels are level and properly aligned.
5. Check Alignment and Level:
- Use a level to ensure that the fence panels are straight and level. Make any necessary adjustments before fully securing the panels.
6. Secure Panels and Finishing:
- Once the panels are aligned and level, tighten the screws or bolts to secure them to the brackets.
- Double-check the alignment and make final adjustments if needed.
- Trim any excess wood if the panels are longer than the distance between posts.
7. Finishing Touches:
- If using concrete, ensure it has fully cured before applying any additional weight or stress to the posts.
- Add gravel around the base of the posts for proper drainage and to prevent moisture buildup.
8. Optional Treatment:
- Consider applying a sealant or protective coating to the wooden panels to enhance their longevity and appearance.
9. Regular Maintenance:
- Periodically inspect the fence for any loose screws or bolts. Tighten them as needed.
- Check for signs of rust or corrosion on the metal posts and address any issues promptly.
Galvanized Steel Fence Posts For Wood Fence
Galvanized steel fence posts for wood fences are a sturdy and durable foundation option that provides essential support and stability to wooden fence structures. Galvanized steel refers to steel that has been coated with a protective layer of zinc through a process called galvanization. This coating helps to prevent corrosion and rust, ensuring the longevity of the posts even in harsh weather conditions.
Key Benefits of Galvanized Steel Fence Posts
- Strength and Durability: Galvanized steel posts are exceptionally strong and can withstand the elements over an extended period. This durability makes them an ideal choice for supporting the weight of a wooden fence.
- Corrosion Resistance: The zinc coating on galvanized steel acts as a barrier against moisture and corrosive elements, such as rain and humidity. This protection prevents rust from forming on the posts, which can weaken the structure over time.
- Longevity: Galvanized steel fence posts have a longer lifespan compared to untreated steel or wooden posts. They are less prone to decay, rot, and insect damage, ensuring that your fence remains sturdy and intact for years.
- Low Maintenance: Unlike untreated steel, galvanized steel does not require regular maintenance to prevent rust. This reduces the need for frequent upkeep and contributes to cost savings in the long run.
- Versatility: Galvanized steel fence posts are available in various sizes and shapes, making them versatile and suitable for different types of wooden fence designs and applications.
- Ease of Installation: Galvanized steel posts are relatively easy to install, and they can be set securely into the ground or attached to a concrete base, depending on the specific requirements of your fence project.
Talk to a Fence Contractor Near You
Installation Process
- Prepare the Area: Determine the fence line and mark the locations where the steel posts will be installed. Clear the area of any debris or vegetation.
- Dig Holes: Use a post-hole digger to create holes for the steel posts. The depth and diameter of the holes will depend on the size of the posts and the height of the intended fence.
- Place the Posts: Insert the galvanized steel posts into the holes. Ensure they are level and aligned properly. If necessary, use braces to hold the posts in place temporarily.
- Secure the Posts: Backfill the holes with soil or concrete to secure the posts in place. If using concrete, follow the manufacturer’s instructions for mixing and pouring.
- Attach the Wooden Fence Panels: Once the steel posts are securely in place, attach the wooden fence panels to the posts using appropriate hardware. This can include brackets, clips, or screws.
- Check Alignment and Level: Use a level to ensure that the fence panels are straight and level. Make any necessary adjustments before fully securing the panels.
- Finish and Maintain: Once the fence panels are securely attached, check the overall alignment and stability. Periodically inspect the posts for signs of rust or damage, and address any issues promptly to maintain the fence’s integrity.
Best Metal Post For Wood Fence
fence advise editor’s choice
Metal Post For Wood Fence
Wood Fence With Metal Posts Cost
Installing a wood fence with metal posts offers a combination of the traditional aesthetic appeal of wood and the durability of metal. The cost of such a fence can vary based on several factors, including the type of wood, the design of the fence, the quality of the metal posts, and labor expenses.
Sample Cost Breakdown
Here’s a simplified cost breakdown for installing a wood fence with metal posts, based on a 100-foot-long fence:
| Component | Cost Range |
|---|---|
| Wood Panels (Cedar) | $800 – $1,500 |
| Metal Posts (Steel) | $300 – $600 |
| Hardware and Concrete | $100 – $200 |
| Labor (Installation) | $400 – $800 |
| Finishing Treatments | $50 – $150 |
| Total Cost | $1,650 – $3,250 |
Additional Considerations
- DIY vs. Professional Installation: Opting for professional installation ensures proper alignment and stability but comes at a higher labor cost. DIY installation can save money but requires time and skill.
- Maintenance Costs: Wood fences may require maintenance over time, such as repainting or restaining, which adds to the long-term cost.
- Location: Prices can vary based on your geographical location and local market conditions.
- Long-Term Savings: While the initial cost of metal posts might be higher than traditional wood posts, their durability and resistance to decay can lead to long-term savings by reducing maintenance and replacement costs.
- Customization: Intricate designs or specific wood and metal choices can increase costs.
How To Build A Wood Fence Gate With Metal Posts?
Building a wood fence gate with metal posts is a practical and durable solution that combines the rustic charm of wood with the strength of metal. Follow these steps to create a sturdy and functional gate that complements your fence while ensuring proper installation on metal posts.
Materials You’ll Need:
- Wood Boards: Choose suitable wood boards for the gate, such as cedar, pine, or redwood. Make sure they are the appropriate size and thickness for your design.
- Metal Posts: Galvanized steel or aluminum posts are recommended for their durability and resistance to rust.
- Gate Hardware: Hinges, latch, screws, and other gate hardware are essential for smooth operation and security.
- Tools: Tape measure, level, saw, drill, screwdriver, wrench, pencil, and safety equipment.
Step-by-Step Guide:
- Measure and Plan:
- Measure the opening between the metal posts to determine the gate width. Leave a small gap for proper clearance (usually around 1 inch).
- Decide on the gate height. Standard heights are usually around 4 to 6 feet.
- Cut Wood Boards:
- Cut the wood boards to the desired width and height of the gate.
- For the frame, cut two horizontal boards (top and bottom) and two vertical boards (sides). Use a cross-brace for additional support if desired.
- Assemble the Frame:
- Lay out the cut boards on a flat surface to create the gate frame.
- Use corner brackets or metal plates to secure the frame joints. Make sure the frame is square by measuring diagonally.
- Attach Pickets:
- Attach vertical pickets to one side of the gate frame using screws. Leave a small gap between pickets for visual appeal.
- Add a horizontal top rail and a bottom rail, securing them to the pickets.
- Prep for Metal Posts:
- Measure and mark the location of the hinges on the gate frame.
- Position the gate against the metal posts to mark where the hinges will attach to the posts.
- Install Hinges:
- Attach the hinges to the gate frame using screws. Make sure they are level and aligned with the metal postmarks.
- Attach the Gate:
- With the help of a friend, hold the gate against the metal posts.
- Secure the hinges to the metal posts using appropriate hardware. Use self-tapping screws if necessary.
- Install Gate Hardware:
- Attach the gate latch on the opposite side of the hinges. Ensure it aligns with the latch receiver on the adjacent post.
- Test and Adjust:
- Test the gate’s movement to ensure it swings smoothly and latches securely.
- Make any necessary adjustments to the hinges or latch for proper alignment.
- Finish and Maintain:
- Apply a weather-resistant finish or paint to protect the wood from the elements.
- Regularly inspect and maintain the gate and hardware to ensure they remain in good condition.
Tips and Considerations
- Post Strength: Metal posts provide sturdy support. Ensure they are securely anchored in the ground or concrete.
- Gate Weight: Consider the weight of the gate when choosing hinges and hardware. Heavy gates may require heavier-duty hardware.
- Bracing: For wider gates, consider adding a diagonal brace to prevent sagging.
- Clearance: Leave a small gap between the gate and the ground to prevent friction and allow for smooth swinging.
- Safety: Follow safety precautions when using tools and equipment
Conclusion
Adding metal posts to your wooden fence offers a winning combination of durability and aesthetics. This process ensures a long-lasting and sturdy fence that can withstand the elements while maintaining its charming appearance. By following the steps outlined and considering the factors discussed, you can create a fence that not only protects your space but also enhances its overall appeal.
At FenceAdvise, we pride ourselves on being the most reliable and trustworthy source of fencing information. Our articles are based on only the highest quality sources, including peer-reviewed studies, to ensure that our readers always have access to accurate information. Read more about our Editorial Guidelines, About Us.